VICE
Introduction
So what's an emulator? Some people say it's the only useful thing a modern PC can do. Emulation is making a computer do the same thing another computer does.
The modern PC can act like it is a Commodore 64. The program that does this trick is called an emulator. For the Commodore range of Computers there are several emulators available. VICE is a very good emulator and is kept up to date by a very enthusiastic team of programmers all around the world. Another advantage of VICE is that it can emulate about all of the 8-bit Commodore computers.
Not only the computer itself is fully emulated but also the diskdrive, datassette and printer. Besides software on virtual cassettes and virtual diskettes you can also use memory expansions, cartridges and much more.
VICE can be run on many platforms, at the moment VICE can be used on the following platforms: Unix, MS-DOS, Win32, OS/2, Acorn RISC OS, BeOS, QNX 6.x, Amiga, GP2X or Mac OSX. [112]
Installation of VICE.
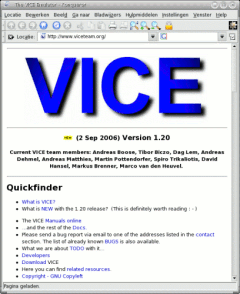 First go to the website www.viceteam.org/
Scroll down the page to the Download section. Choose the version that you want to use. In this article we are going to use the MS-Windows 32bit (V1.20) version. Click on the link and download the zipped archive.
Double click on the downloaded file: WinVICE-1.20.zip and unzip the files to a location on your hard disk. For the unzipping of these files you can use a program like &-Zip or a similar program.
All files from the archive will be placed in a folder called WinVICE-1.20. In this folder you will find a lot of files, programs and folders.
The programs you want to use are: x128.exe, x64.exe, xcbm.exe, xpet.exe, xplus4.exe and xvic.exe. The other files are used by these programs and contain things like the ROM's and fonts. [113]
Starting VICE.
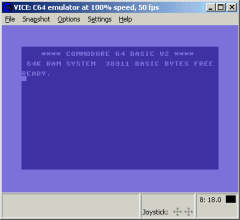 Starting VICE begins with choosing which Commodore computer you want to use. In this article we are going to use the Commodore 64. Go to the folder WinVICE-1.20 on your harddisk and double click on the file: x64.exe.
The screen on the right appears on your desktop. You now have a fully working Commodore 64 inside your PC.
If you want to start another Commodore computer simply double click on one of the other x???.exe files. It is possible to run more than one Commodore computer at the same time.
In the title of the window you can see which computer is running at the moment (C64). Next to that is the speed of the system. The normal speed is 100%. Next to that is the number of frames that are displayed per second. The normal fps is 50.
It is possible that the speed and fps drop to lower numbers. If this is the case your PC does not have the processor power to emulate the Commodore computer. Using "True Drive Emulation" will use more processor power. [114]
Getting software for your virtual Commodore.
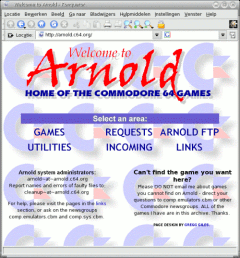 Now you have a complete Commodore 64 running inside your PC. Next question is how do I get software / games for my emulator?
There are many web sites that have games or software for download. A good one is: www.lemon64.com. For this article we are going to use Arnold. Go to the website with this link: http://arnold.c64.org/
Click on the item "GAMES", select the "a" folder and scroll down to "Avenger.Commodore.zip" and double click on this file. Your Operating System will ask where to put the file. You can put it where you like but remember where you put it. Most likely the software is zipped, so unzip the software. In this example you will get a file called "avenger_commodore.t64".
There are thousands of games available on the internet and almost all of them can be used with emulators. Exceptions are original (uncracked) disk-games that use very smart copy protections.
After you downloaded a piece of software you will see that the filename has a extension. In the example it is ".t64" the most common ones are.
- ".d64" - This is a image of one side of a real 1541 type of diskette.
- ".t64" - This is a image of a datassette tape.
- ".p00" - This is a program file. (".prg" works also)
- ".crt" - This is a cartridge image.
There are more diskette image files that can be used: ".x64", ".g64", ".d67", ".d71", ".d80", ".d81" and ".d82" [115]
The VICE File Menu.
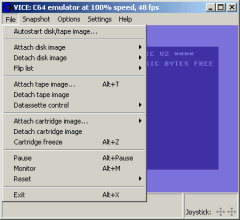 The first drop-down menu in VICE is the File menu. In this article the most used menu items are explained.
Autostart disk/tape image...
A window will open and you can select your software or game. If you click once on the filename more information will show-up in the "Image contents" If you have selected a ".d64" the directory will be visual. If it was a ".t64" it will show the filenames of the programs that are on the tape. (More than one is possible) If you double click on the filename VICE will load the first file and will give RUN to start it.You can also click on a file name in the "Image contents" to load and run it.
Attach disk image / Detach disk image
In this menu item you can attach a disk image to 1 of the 4 virtual disk drives. This is the same as putting a real diskette in a real disk drive. VICE will not try to start the disk image. This can be used if a program asks you to put in another disk.Attach tape image / Detach tape image
In this menu item you can attach a tape image to the virtual datassette. This is the same as putting a real casssette in a real datassette. VICE will not try to start the tape image.Datassette control
In this menu item you can "press" the buttons on the virtual datassette. Some programs have interaction with the datassette before continuing with the program.Attach cartridge image / Detach cartridge image
In this menu item you can attach a virtual cartridge image.Pause
This will freeze the emulator. After selecting Pause again it will continue.Monitor
This will start the build-in machine language monitor.Reset
In this menu item you can reset the computer or one of the diskdrives.Exit
This is the way to shut down VICE. [116]The VICE Snapshot menu.
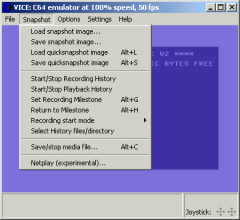
Load snapshot image / Save snapshot image...
When you save a snapshot the complete state of the emulator will be saved. (memory, registers, etc.) It can be compared to a freezer cartridges that can make a backup of your game. With load you can restore the image.Recording / Playback History
If you start "Recording History" all interactions you have with the emulator are stored. You can playback this history when ever you want. This is a way to get to a certain point in a game without playing the first part over and over again. But you can also do repeated task as many times as you want.Save/stop media file...
In this menu you can save a screen shot to your hard disk. But also you can make a movie of your screen when running software, game or demo. You can watch these movies in a media player without the use of VICE. [117]The VICE Options menu.
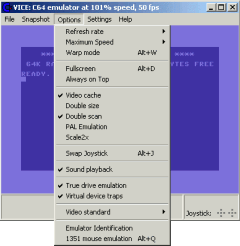
Refresh rate
This controls the number of frames that are produced by VICE. 1/1 is 50 frames per second. 1/10 is 5 frames per second.Maximum speed / Warp Speed
This controls the speed of the computer. 100% is the normal speed but you can make the emulated computer go slower or faster. The maximum speed is limited by the processor power of your PC.In Warp Speed mode the emulated computer will go as fast as it can.
Full screen / Always on top
In full screen mode the only thing on your screen is the emulated computer. The always on top will force the emulator window to the front and it will be always visual.Double size / Double scan / PAL emulation
With double size the screen will be twice as big but the number of pixels used are the same. With double scan the pixels are also doubled. PAL emulation will show a screen that is very much like a real PAL computer on a real television.Swap Joystick
With this option you swap the virtual joystick. This is handy if you have only one joystick attached to your PC.Sound Playback
This switches the sound on or off.True drive emulation
If this option is selected the attached disk drives are fully emulated. This will use more processor power. If this option is turned off only the basic disk drive controls work. Programs that use a speed loader or demo's need the True drive emulation to work.Video standard
Here you can select between PAL and NTSC video. [118]The VICE Settings menu.
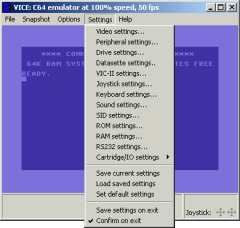
Drive settings
Here you can change the type of virtual disk drive. Add memory to the disk drive and make a 40 track system of your 36 track disk drive.And you can turn off your disk drive. (none)
VIC-II settings
Here you can turn sprite collision on or off. (sprite - sprite / sprite - background)Joystick settings
Here you can configure a joystick. You can choose what sort of joystick you connect to which joystick port.Configuring a joystick:
Click on Config "Keyset A". Select a direction by clicking on the appropriate button (South West, South, South East and so on). Then push on the key you want to use for this direction. For example you can take the up-arrow for North, the down-arrow for South and so on. If you have configured all direction then click on "OK". You can make a second (different) Keyset (B) for the other joystick.
If you have a real joystick attached to your PC you can also configure it the same way as the keys on the keyboard.
Keyboards settings
Here you can choose the keyboard layout.Symbolic means that the symbols on your PC keyboard are the same as on your Commodore computer. Example the " (C64) is the " (PC)
Positional means that the keys on the Commodore are on the same place as on your PC keyboard. Example the " (C64) is the SHIFT-2 (PC)
If you can type on a real Commodore with your eyes closed then use Positional otherwise use Symbolic.
SID settings
Here you can choose how the sound is produced by VICE. The options are Fast SID (Slow PC's), Re SID, (Normal/Fast PC), Catweasel MK3 (PC with a Catweasel PC card installed) or HardSID (PC with a HardSID PC card installed).You can also choose which type of SID chip you want to use 6581 or 8580.
Save / Load / Default settings
Save the current settings means that all settings you have made (for example the Keyset for the joystick) will be saved to your hard disk. With Load you can restore a set of saved settings. Default will cancel all changes in the settings. Selecting "Save settings on exit" will automatically save your changes when you exit VICE. [119]VICE with Ubuntu
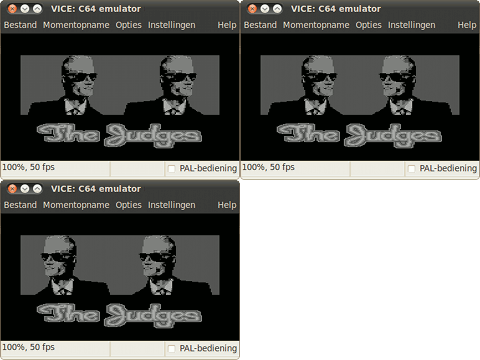 VICE is also available for Linux users. On the right you can see an installation of VICE on Ubuntu 10.04 LTS Lucid Lynx.
Installation tips:
Download the Windows version of VICE and un-pack it.
Use the Ubuntu software centre to install VICE.
Find out where the VICE files are located on your system. On my system the files are in /usr/lib/vice.
Start a terminal-window. Make the maps C64, C64DTV, C128, CBM-II, PET, PLUS4, VIC20, DRIVES and PRINTER (in /usr/lib/vice) write-able.
Example: sudo chmod 777 C64
Copy for each computer in the Windows version the ROM's to the Linux version. The ROM's are the files that start with basic, kernal and chargen. The number of ROM's can vary for each computer.
Copy from the Windows version all the ROM's for the disk drives (DRIVES map) to the DRIVES map of the Linux version. Do the same for the PRINTER map.
Now you can start VICE from the menu. If there are problems you can start VICE from a terminal-window with /usr/bin/x64. In the terminal-window you can see more information at start-up and when you are working with VICE.
Restore the rights of the maps C64, C64DTV, C128, CBM-II, PET, PLUS4 and VIC20 (in /usr/lib/vice).
Example: sudo chmod 755 PET
Delete the map with the Windows version.
The menu in the Linux version can be a bit different but works almost the same as the Windows version.
If you have a slower computer playing sound may cause a problem. [120]
Update: 2011-06-24 20:09:12